Yep. They’re Done.

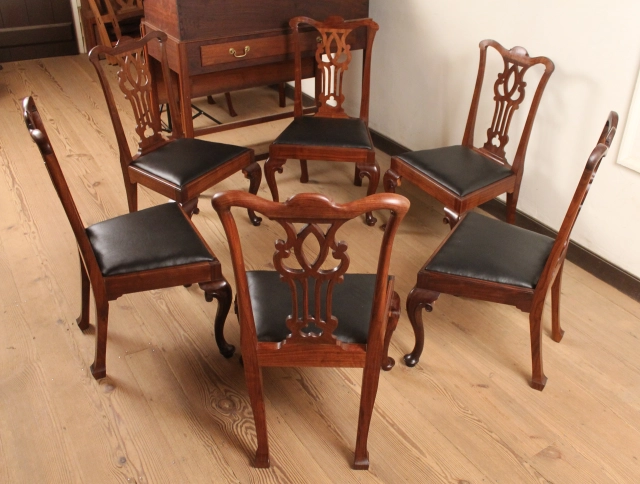
Here they are. The long-awaited, much anticipated Mack Headley designed, Anthony Hay inspired set of chairs. These chairs finished both apprenticeships for Bill Pavlak and I- actually Bill finished his about two years ago. They were set aside to work on desks and several other projects, but were finally upholstered last month. They’ll be taken to the William Prentis store and offered for sale. So for the Holidays, if you’ve got family coming over and folding chairs won’t do…

IMG_5651B

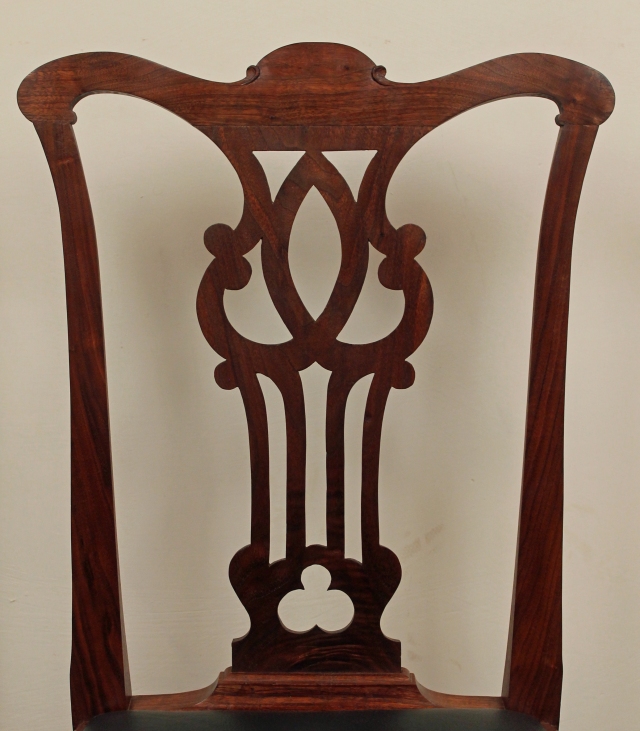
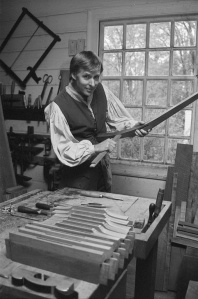
The back takes its inspiration from side chairs made by Robert Walker, King George County, VA 1760-1775:

IMG_5673

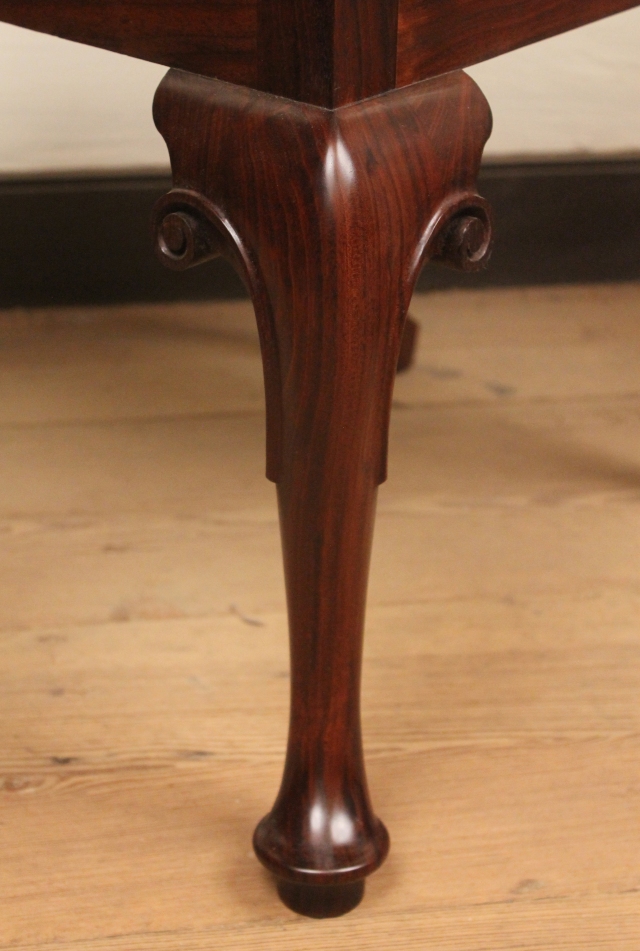
In the 1960’s, archeologists found on the Hay site a unique, bugle shaped foot. It was used on tables as well as chairs. Here’s our rendition:

Brian's Carving

So if you’re in town, stop by the Prentis store.

And the Hay shop.

We’d like to see you.


Posted in Uncategorized | 9 Comments

Come On Get Happy

Perhaps many of you have seen this already via the Colonial Williamsburg website, but if not, here’s the official announcement for our next Working Wood in the Eighteenth Century symposium – co-sponsored by Fine Woodworking:

The Pursuit of Happiness: Furniture for Leisure and Entertainment

While it is a very broad topic, it presents an opportunity to focus on a good variety of pieces, topics, and woodworking techniques.  The official description, schedule, as well as registration information can be found through the link above.

Here are some of the pieces we’ll be covering in January.

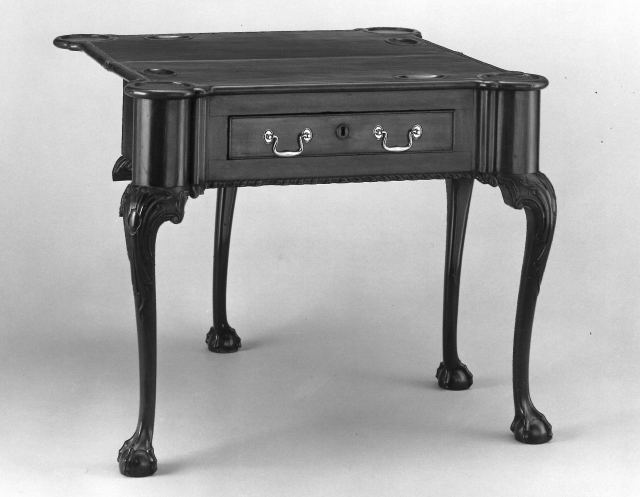
Card Table (1930-225)

Card Table (1930-225), Philadelphia ca. 1765

We’re excited to feature guest speaker Alfred Sharp this year who will demonstrate the construction and decoration of this mid-century Philadelphia card table from our collection.  Alf, a recipient of the Society of American Period Furniture Maker’s Cartouche Award for lifetime achievement, has published and lectured widely on traditional furniture making and brings a perspective informed by deep experience with both traditional and contemporary building techniques. 

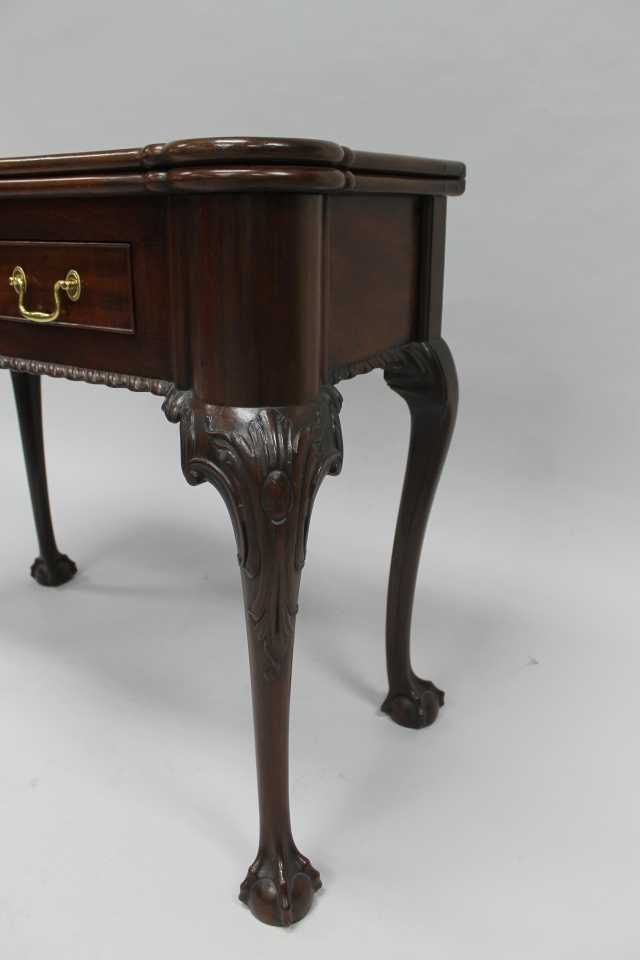
Here is a closer look at some of the mahogany table's carved features.

Here is a closer look at some of the mahogany table’s carved features.

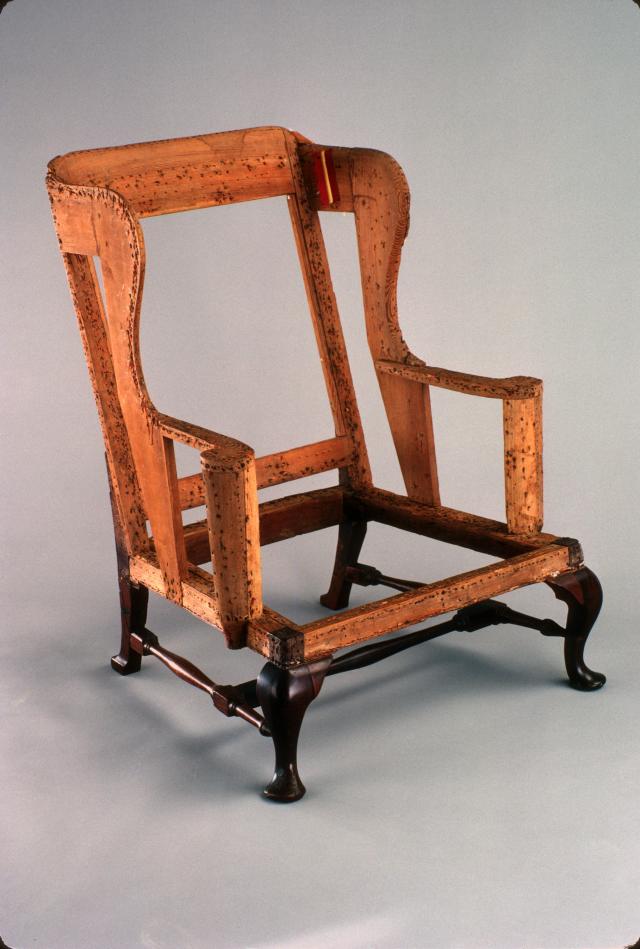
Cabinet shop supervisor Kaare Loftheim and Colonial Williamsburg’s conservator of upholstery Leroy Graves will explore and demonstrate the construction and upholstery on an easy chair attributed to the original Hay Shop.  This will be the first time we’ve had a chance to sink our teeth into more complex upholstery at the Symposium.

Easy Chair (1989-372), Williamsburg, VA attributed to the shop of Anthony Hay, ca. 1750 - 1770.

Easy Chair (1989-372), Williamsburg, VA.  Attributed to the shop of Anthony Hay, ca. 1750 – 1770.

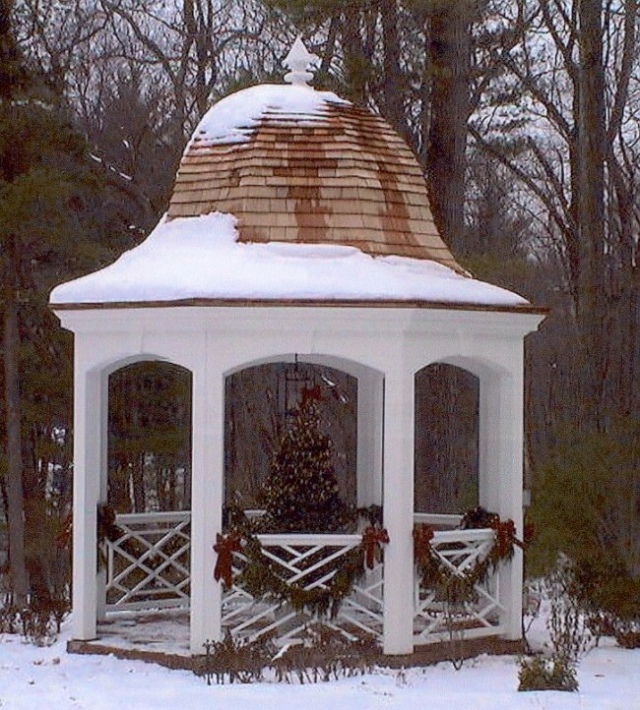
For something equally suited to relaxation in an upscale manner, and also unexplored in past symposia, joiner Ted Boscana will demonstrate some of the work required to build a stylish gazebo.  While he won’t build the entire thing onstage (I hope you understand why), this will be our first look at a freestanding outdoor structure.

Gazebo, Colonial Williamsburg. Snow and seasonal decor may or may not be featured in the program.

Gazebo, Colonial Williamsburg.
Snow and seasonal decor may or may not be featured in the program.

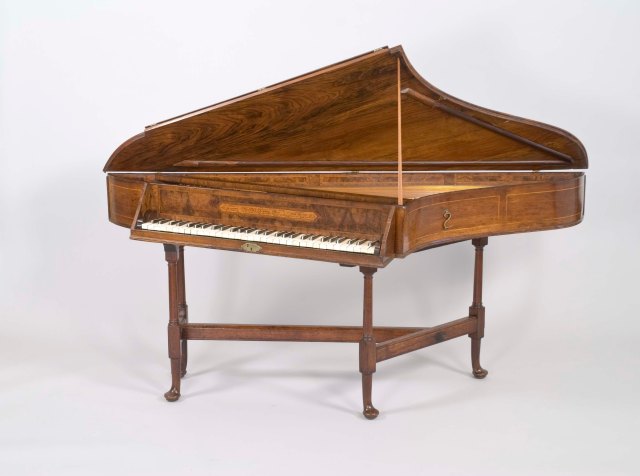
For some the pursuit of happiness has a soundtrack so to that end harpsichord maker Edward Wright will walk attendees through some of the structural, mechanical, and decorative work that goes into making a spinet.  Perhaps you’re thinking that spinet making is not in your future, no matter, the techniques and tools involved in this work can all be employed in or adapted for cabinetmaking.  Besides, this program just might convince you that making a spinet would be more worthwhile than making yet another workbench or tool chest – you never know.

Spinet (1960-321),

Spinet (1960-321), London,  made by Cawton Aston, 1726.

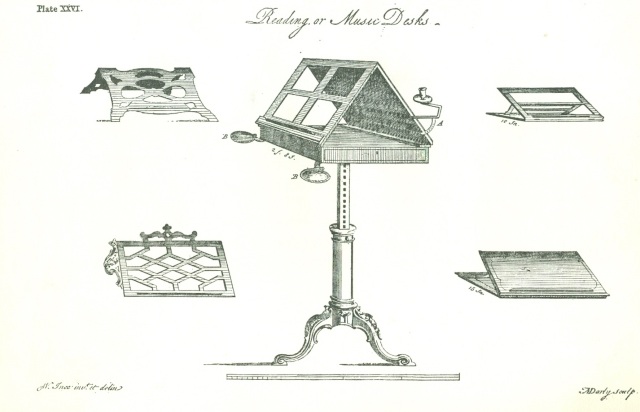
Cabinetmaker Bill Pavlak will explore various approaches to making tripod base music and reading stands.  Such pedestal bases could also be used to support frames for needlepoint and other sewing work.  The presentation will focus in part on working with period pattern books.  

Plate XXVI form The Universal System of Household Furniture by Ince and Mayhew, 1762.

Plate XXVI form The Universal System of Household Furniture by Ince and Mayhew, 1762.

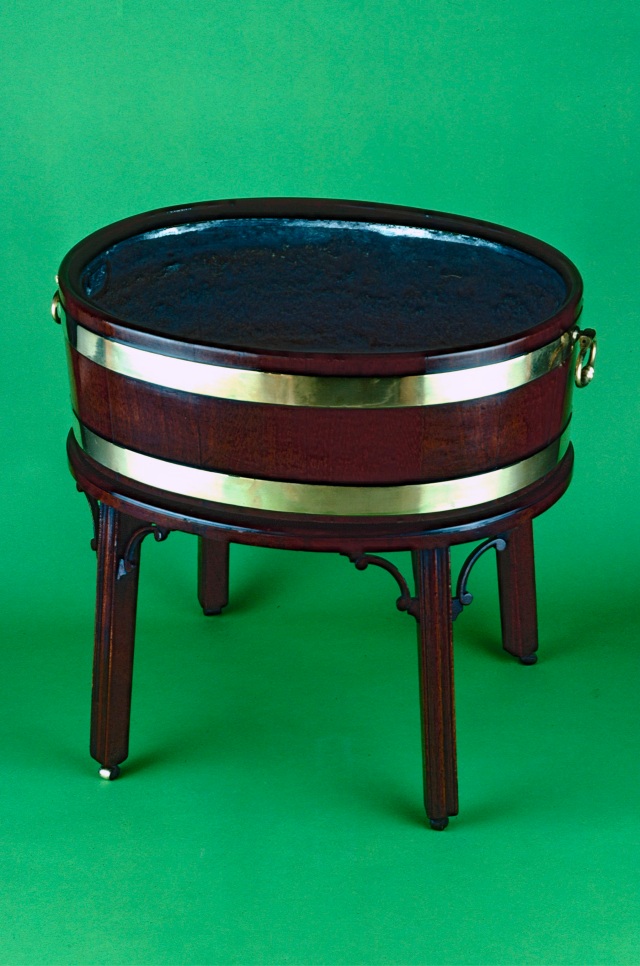
If your search for happiness leaves you thirsty or if thirst quenching is an integral part of your pursuits then these next pieces may be of some interest.  Colonial Williamsburg Cooper Jonathan Hallman along with cabinetmaker Brian Weldy will demonstrate the construction of this coopered mahogany wine cooler on stand (apparently Messrs. Bartles & Jaymes didn’t know what a wine cooler really was.  Hallman and Weldy will set them straight).

Wine Cooler (1989-368), England, ca.1760.

Wine Cooler (1989-368), England, ca.1760.

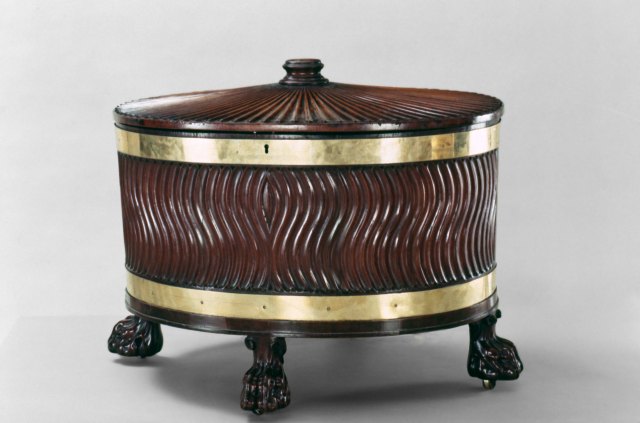
Mr. Weldy will also explore a much more ornate wine cooler that he’ll scale down to the size of a tea caddy.  This will allow us to not only look into the intricate carved patterns and alternate approaches to coopered construction, but also into the issues that arise in scaling pieces up or down in size.

Wine Cooler (1972-343), England, 1755-65.

Wine Cooler (1972-343), England, 1755-65.

What else?  Furniture curator Tara Gleason Chicirda will open the conference with an illustrated overview of eighteenth century leisure activities and the material culture surrounding them.  Later in the conference she’ll present a brief look into the structure of a period billiard table and curator Jan Gilliam will share some of the wooden toys in our collection.  Special guest, independent scholar Jane Rees, will join us once again – this time to discuss gentlemen’s tools and tool chests (in other words the really fancy tools used by well-off amateurs).  Many of you will know of Jane through her co-authorship of the book on the Benjamin Seaton tool chest, if not her many other publications on the history of tools and technology.

What else?  We’ll have a panel discussion with all of the presenters as we did last year, a tool swap, optional tours of our conservation facilities, a banquet with a yet to be determined presentation, an opening reception with drinks, breakfasts, plenty of opportunities to talk to fellow cabinetmakers at all levels of skill and experience and much more.

We hope to see you all here – we’re really looking forward to sharing this year’s diverse selection of projects and topics.  If you’ve never been before and want to know more please ask or check out these posts from past conferences:

2015 Desks; 2014 Dining Room Furniture

More soon…

Posted in Uncategorized | Leave a comment

Time Goes By

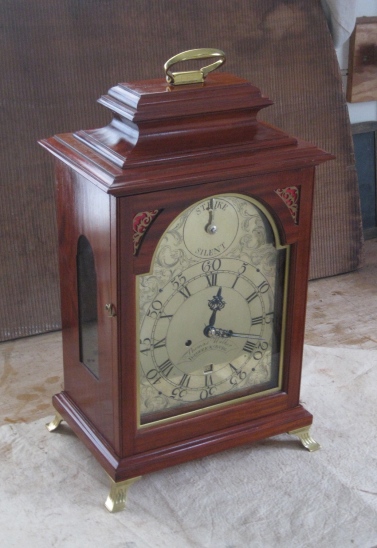
IMG_5091

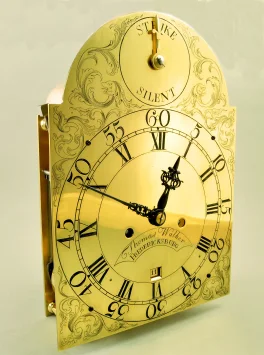
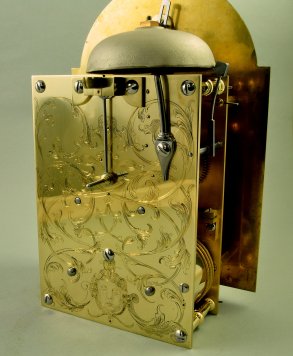
As some of you may know the long awaited bracket clock works arrived last fall.  The works, made by clockmaker David Lindow of Lake Ariel, Pennsylvania replicate the original set by 18th century Fredericksburg, Virginia clockmaker Thomas Walker.

will clock 1 - Copy

will clock 2

The clock was one of the subjects presented in our 2013 Symposium: Working Wood in the 18th Century; Small Things Considered, and was the product of a great team of talented Colonial Williamsburg tradesmen.

IMG_4805

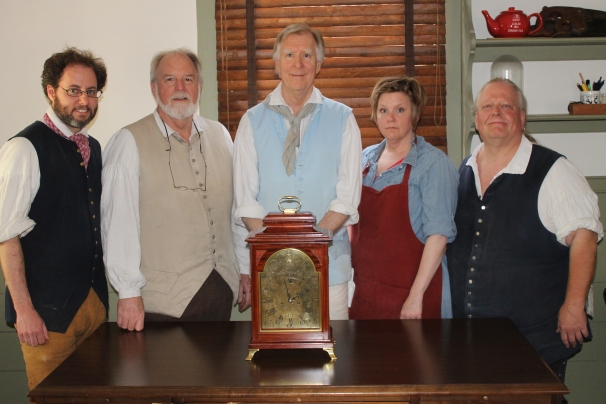
From left to right: Bill Pavlak, journeyman cabinetmaker, planed the base and cornice molding; George Suiter, master gunsmith, engraved and blackened the Arabic and Roman numerals; Kaare Loftheim, journeyman supervisor cabinetmaker, framed up the case, doors, and cap; Lynn Zelesnikar, master hand engraver, executed the decorative detail on the clock face and back plate; and Mike Noftsger, journeyman brass foundryman, cast and polished the brass feet.

IMG_4830

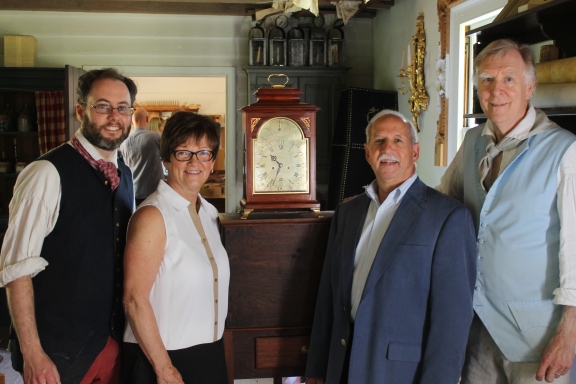
Work on the clock was closely followed by a local couple who finally took possession of it this spring.Their appreciation is a great source of satisfaction for all of us.

Posted in Uncategorized | 4 Comments

A New Spinet… Almost Done

New Spinet

New Spinet

Hello everyone.

It’s been a long time since I’ve posted on this site.  Work has rolled along and time has passed me by, like always for us all.  But I finally have something to show for the efforts.  You see it here.
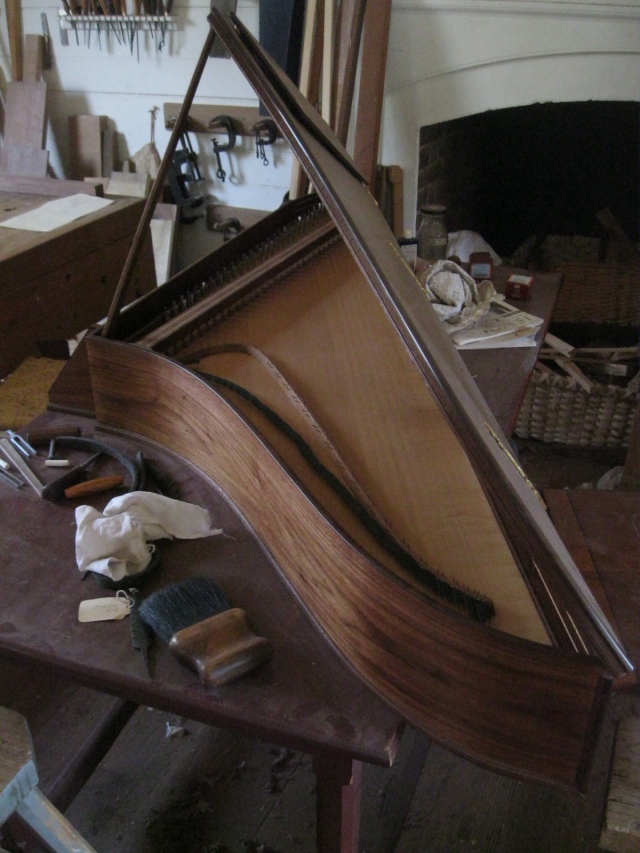
Stringband View

Stringband View

The work has ranged from assembling and installing a spruce soundboard, making cherry bridge and nuts, moldings, forging the heads of tapered pins for tuning pins, making an apprentice (Yes, I had one for about eight months) cut and shape brass pins to hold the strings, the actual stringing, making a lid, cleaning brassware from the Geddy Foundry across town… oh, yes, and making everything work for its main purpose: music.

My former apprentice, Bethany Allen McGuire, came at just the right time, since it takes two people to effectively string up this instrument.  We had individual duties in the process for each string.  Bethany quickly became adept at spinning the hitch loops for the wire, while I worked on drilling technology (something I will post about soon).  The first couple of strings in the bass each took over a half hour to get in place.  But soon we were up to about five or six an hour.  Hearing each string pull up to pitch and the spinet making its first sounds… that kind of excitement spurred us on.  Then we had to mount the action and keyboard, a seemingly endless process.  For Bethany, this was a good introduction  to how spinets really work.

I’m just glad it’s staying together.

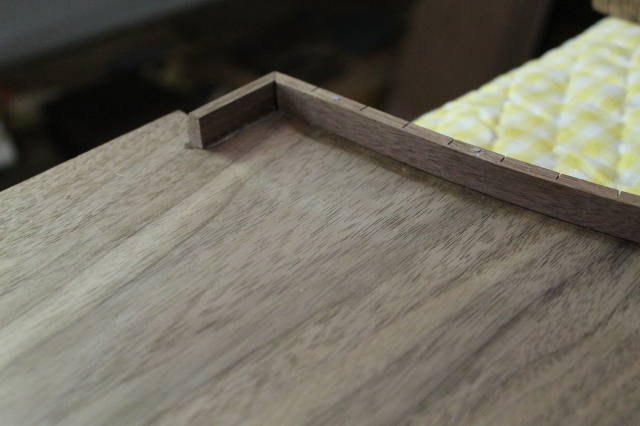
We teamed up for assembling the lid, four pieces of black walnut edge-glued, she cut it to shape while I made the moldings and we both worked on kerf-bending and installing them.  It was one of the fastest lid assemblies I can remember.
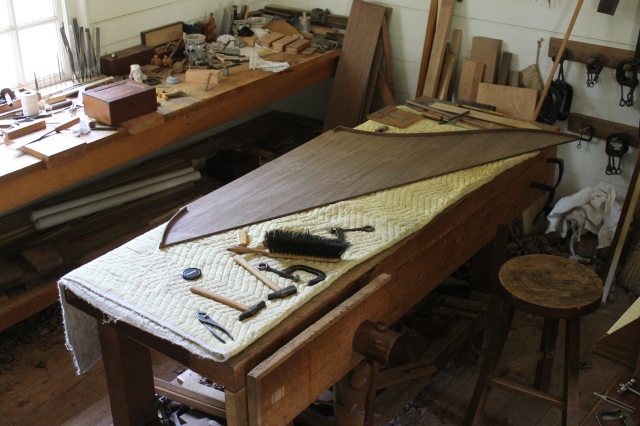
Walnut Lid Under Assembly.
Walnut Lid Under Assembly.

Front Corner Joint of Lid Moulding.  Note the kerfs to bend the long strip.

Front Corner Joint of Lid Moulding. Note the kerfs to bend the long strip.

Here’s a picture of the front veneered panel:
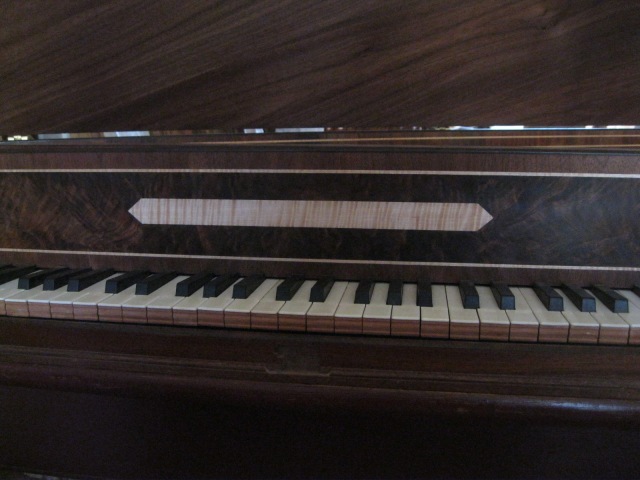
 Maple Nameboard Center

Maple Nameboard Center

No inscription yet here.  Bethany gave me a complete surprise when she said she had done calligraphy before.  I just about fell down on the floor, for I had really been wondering how to solve that problem.  With a bit of instruction and the loan of a few good tools from cooper Ramona Vogel-Hill (who also works calligraphy on the side), Bethany worked on the block printing while I experimented with surface treatments to prevent the ink from feathering into a mess in the wood grain.
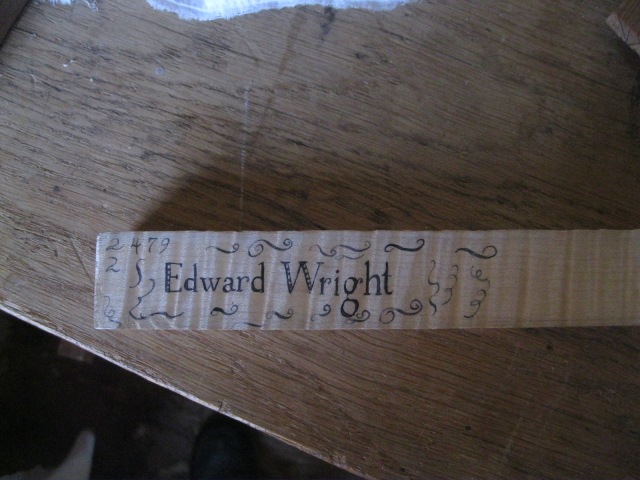
Experimental Inscription on Curly Maple.

Experimental Inscription on Curly Maple.

The maple was planed smooth with my try plane with a tight throat.  Then I abraded it with fine emery paper.  I know what you are all going to say, WHA?  IT WAS ALREADY SMOOTH!  True, but I sanded it down very finely and left the dust in place.  Then a very thin cut of seedlace varnish, one coat, was applied, then left to dry for a half hour.  It would seal the dust into the pores.  A very, very light sanding with emery to remove any possible blemishes in the surface and then Bethany went to work.

How do you determine success here? Well, for me, if the wood is clear and smooth enough, the lettering should look like it floats above the surface of the wood figure.  A visual depth should result that almost looks three dimensional, as if you could pass you fingers behind  the letters but above the curl figure of the maple.

All the walnut casing is finished with three coats half boiled linseed oil, half spirits of turpentine.  Final top coating will be beeswax.

Unfortunately, Bethany left us at the end of last month, and I was sorry to see her go.  Let me say here publicly that without her assistance and initiative, the spinet would not be where it is or in the finished state and character that it possesses.  Yes, most of the work is mine, but she contributed to its completion in many ways.  My name goes on the nameboard, but it is proper and right that she has signed her name on the lowest key, in the traditional 18th century spinet practice.
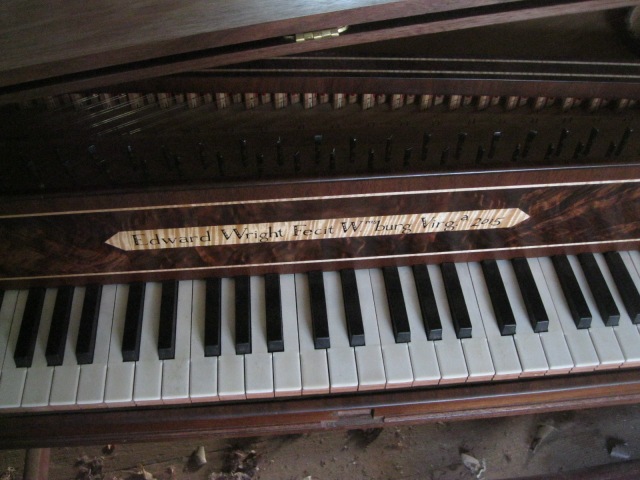
Final Nameboard, Keyboard and Mechanics Installed.
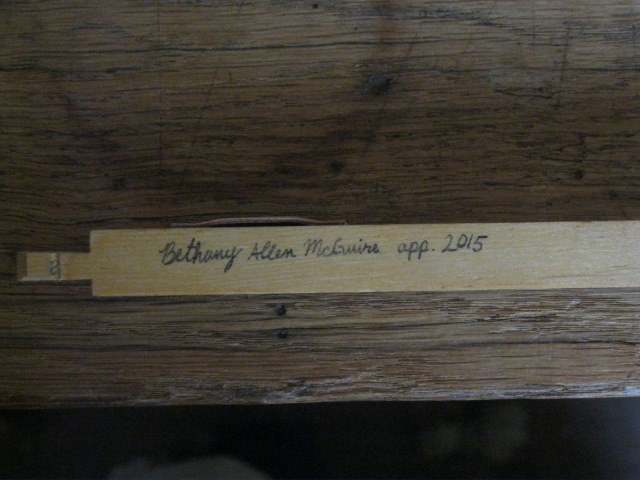
Final Nameboard, Keyboard and Mechanics Installed.

IMG_4950

In the coming weeks, now that I’m at a pausing point, I hope to post more blogs backtracking some of the interesting features of the work in its latter stages.  First, a video (I think our first here) of the spinet being played; New drill methods; work on a simple music rack and other things that come to mind.  Famous last words, I know, but some neat things have been discovered along the way.

Oh yes, I have been advised to announce that the shop has a page on Facebook now.  It will be more for quick, interesting photos and announcements, but will not replace this blog, which will continue to cover more in depth issues.  As we can.

Now, the question to myself  is….

Can I actually do this again, and to the same level?
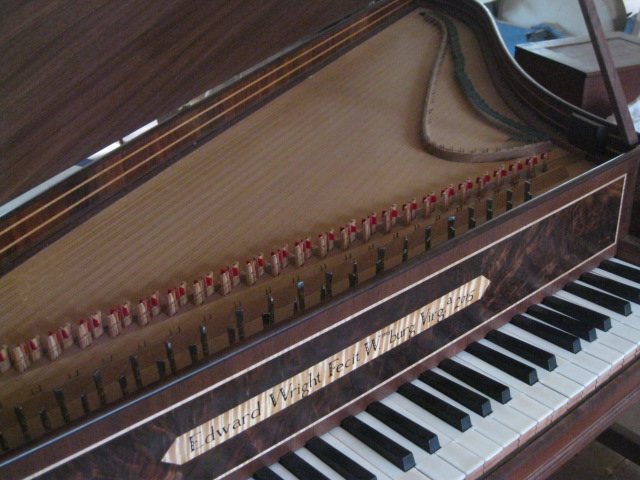
Finished Nameboard, Keyboard and Action In Place.

Finished Nameboard, Keyboard and Action In Place.

Best,

Ed Wright
 

Posted in Harpsichords and Spinets, Shop Happenings | 9 Comments

Another Symposium Done Gone

Brian built himself into this block front desk.

Brian Weldy built himself into this blockfront desk.

It’s a bit embarrassing writing with the realization that we have been silent for so long.  The last post was about the next symposium.  This will be about the same symposium, but we’ll have to call it the last symposium now.

We think it went pretty well, or at least we enjoyed ourselves and learned a lot and hope all of our attendees did as well.  Conferences such as this are made possible by the work of many people within Colonial Williamsburg and we are, as always, grateful to them.  Ron Hurst, Vice President of Collections, concluded our opening night’s program with a eulogy in honor of Jay Gaynor, the founder and now guiding spirit, of these annual gatherings.  He highlighted Jay’s commitment to good scholarship, good work, and good humor, which are the same qualities we strive to impart in our presentations.  Sometimes we get it right and other times…

By covering a fairly broad topic like desks, we were able to span the entire eighteenth century in terms of style and construction.  It is easy for woodworkers and writers to treat the eighteenth century as a single moment in time, a time in which people worked with hand tools, built great furniture, and dressed funny.  Our aim was to juxtapose pieces and presentations to reveal substantial changes and surprising similarities in workmanship, design, and technique among early, middle, and late century pieces.  Handwork was different in 1707 (the date of our earliest piece) from what it would become ninety years later (roughly the time when the Seymours built the latest piece we explored).  This, in turn, is different from how many people approach hand tool woodworking today.  Changes in time and place, changes from one craftperson’s perspective to another’s, these are the things we hope to bring out as we move through these conferences.  To that end, we all learn a lot from the insights of our audience. Insights that support, contradict, or challenge our assertions are precisely what make these symposia a valuable experience.  All of us in the Hay shop are grateful for all who attended and were willing to get down and dig through the arts and mysteries of eighteenth century work with us.

For those of you who have never been to one of these, here is a small sampling of what came to pass over our two sessions of this year’s conference.  We look forward to seeing you next year!

Look for more active blogging in the coming year and the launch of our Facebook page in the coming days (we are only several years behind on that one).

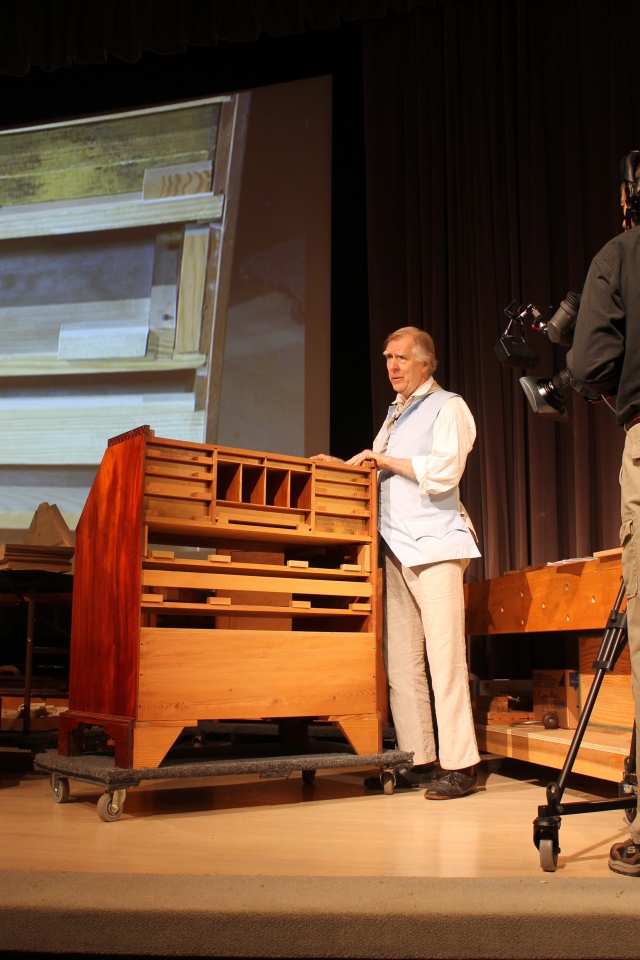
The Hay Shop's leader, Kaare Loftheim, guides the audience through the many structural refinements found in a Norfolk, VA made

The Hay Shop’s leader, Kaare Loftheim, guides the audience through the many structural and aesthetic refinements found in a Norfolk, VA made desk and bookcase from the decade preceding the American Revolution.  The original is on display in the museum gallery right above the auditorium.  This is a reproduction Kaare built some twenty-five years ago and usually resides here in the shop’s ware room for all to examine.

IMG_4535

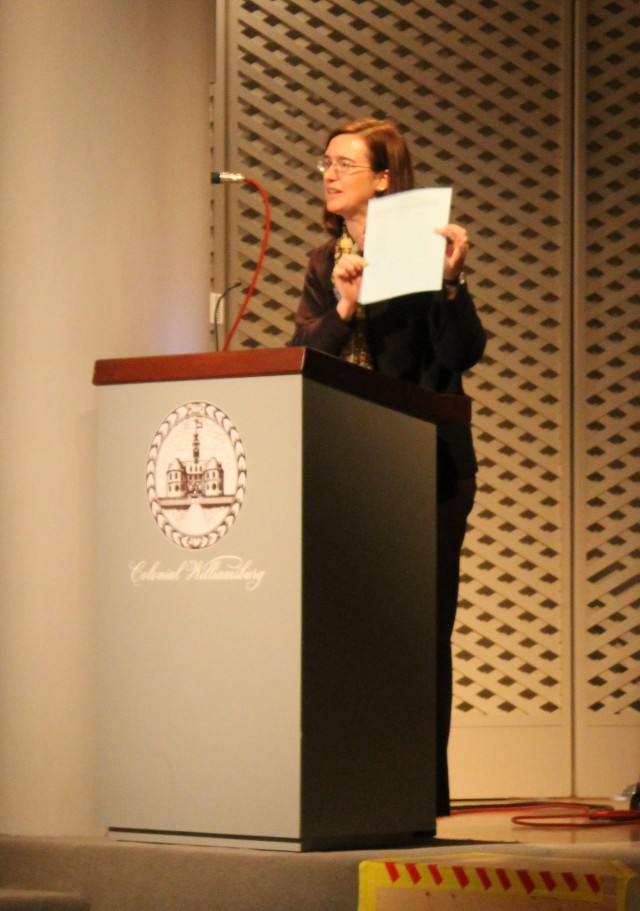
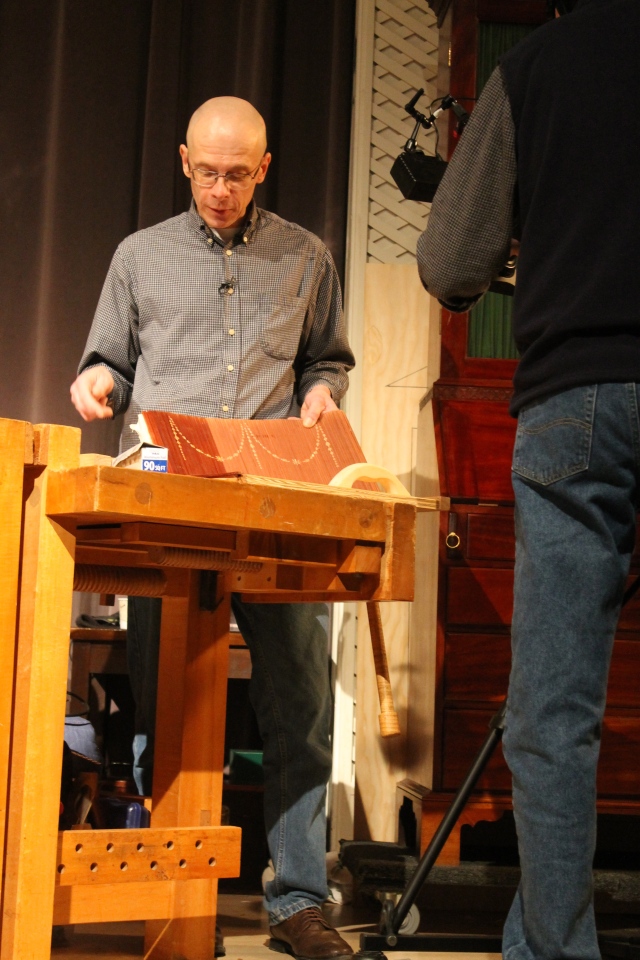
Tara Chicirda, Colonial Williamsburg’s curator of furniture, opened the conference with an in depth look at the evolution of various desk forms. She also prefaced presentations by offering a curatorial perspective on the pieces being demonstrated. Her increased role in the symposium was greatly appreciated by all of us and those in attendance as well.

IMG_4551

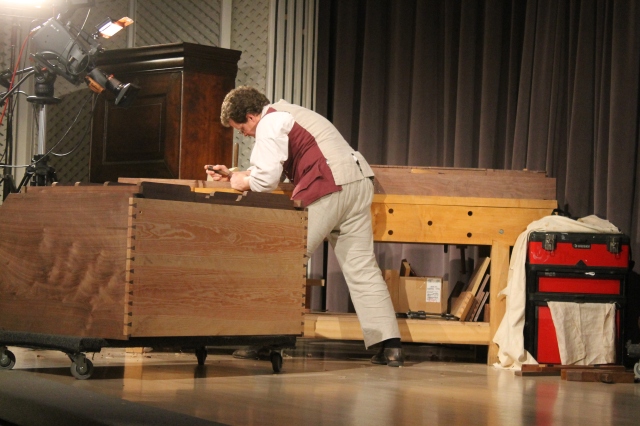
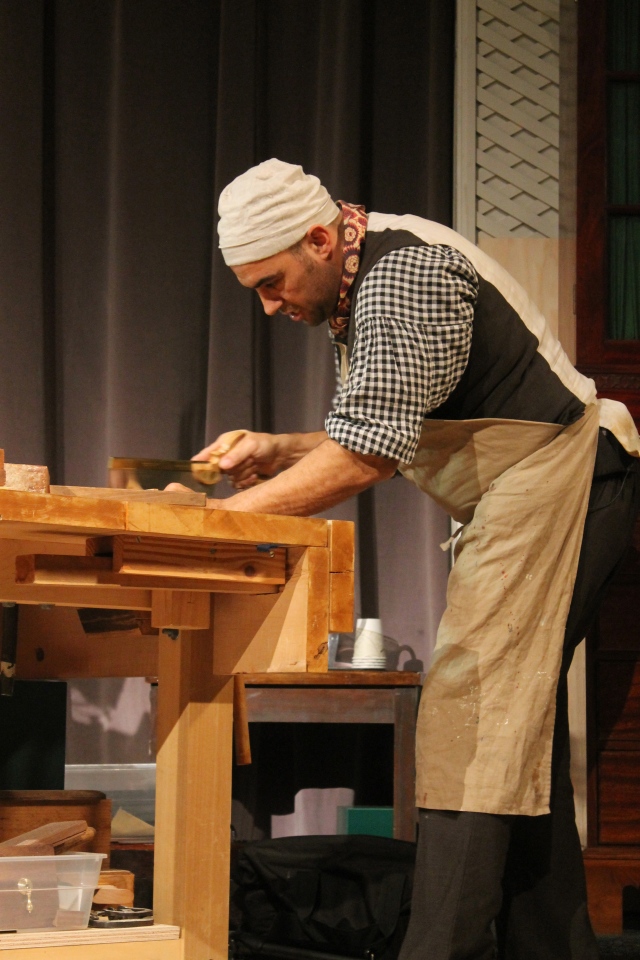
Brian Weldy demonstrates one of many sculptural methods employed to reproduce a Norfolk, VA blockfront desk.

IMG_4561

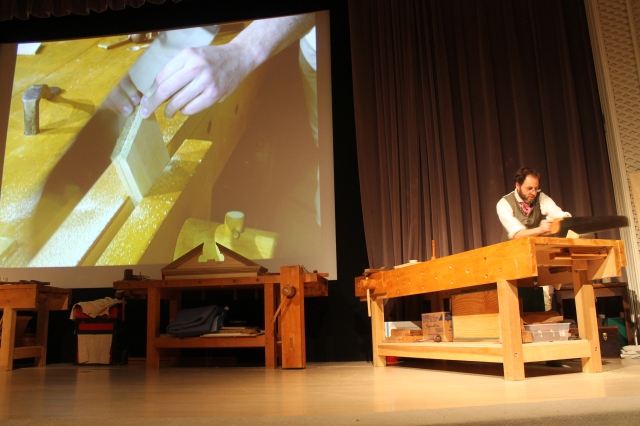
Bill Pavlak demonstrates resawing techniques in Atlantic white cedar, the wood used for drawer bottoms in the 1707 Philadelphia escritoire he presented. Notice the large screen and fine detail oriented camera work that are an integral part of every conference.

IMG_4570

Guest speaker Rob Millard demonstrated many aspects of a Seymour lady’s writing cabinet including the decorative inlay work on this tambour door. Rob’s skill and humor were a very welcome presence.

IMG_4579

Ted Boscana, leader of Colonial Williamsburg’s joiners shop, demonstrated wedged dovetail construction as part of his exploration of a Virginia desk on frame.

Here’s to a new year of woodworking!

The Hay Shop.

Posted in Desks, Shop Happenings, Symposium | Tagged , , | 5 Comments

The Next Symposium!

We’re excited yet saddened with our preparations for the January 2015 Working Wood Symposium. This will be the first symposium since its inception in 1999 that our director, Jay Gaynor will not be present. The Working Wood Symposium was Jay’s baby, and it’s not going to be the same without him.  Jay was excited with the theme of desks and the pieces we had chosen.

Entitled ‘Desks: The Write Stuff’, the program will feature four very different desks presented by Bill, Brian, Ted and I, as well as a Seymour lady’s writing desk with tambour by guest presenter Robert Millard.

Bill will be presenting the earliest piece, a Philadelphia scriptor.  The maker, Edward Evans did us the favor of stamping his name and date, 1707, on the inside of the case. Turns out that it’s the earliest dated Philadelphia case piece!  This will be an interesting exploration.

1958-468_DS99-37[2]

Ever heard of a southern block front?  Sounds like an oxymoron to me. We’ve got a beautiful example in our collection, probably by a Norfolk, Virginia maker.  Brian has been dressing out stock for his presentation of this desk.

1951-398[2]

These two pieces are quite a contrast with some of the urban English cases being made in tidewater Virginia. I’ll be looking at the Galt desk and bookcase in detail. There are some interesting structural and aesthetic refinements that we’ll be exploring.

1978-9[2]

Finishing out this century is an exquisite Seymour lady’s writing desk with tambour.  The federal period is Robert Millard’s niche.  Below is a piece from Robert’s web site, americanfederalperiod.com. We’re still canvasing museums for the particular piece to present.

sey-tam-1[1]

And finally in contrast to all of this is a utilitarian piece, a desk on frame from the Virginia Piedmont.  Ted Boscana will take a brief look at some of the idiosyncrasies of this country piece.
1968-304[1]

As always there will be a lot of action, good food, camaraderie, tools, tours and entertainment.  The full program will be posted in a couple of weeks on the Colonial Williamsburg web site.  Till then, in the words of Jay Gaynor, “keep calm and carry on”.

Kaare

Posted in Symposium, Uncategorized | Tagged , , , | 6 Comments

In Memoriam Jay Gaynor

Jay Gaynor

We have lost a leading light.

Jay Gaynor, Director of Historic Trades, died suddenly yesterday morning.  Needless to say, all of us tradesmen and women here are in shock.

Jay possessed a consummate knowledge in his chosen field of historic technology.  But he wore his erudition easily.  And he encouraged us all to know more and find out more.  But not just having information was enough.  He always looked for ways to make giving that knowledge fun, interesting and very cool.

He was interested in everything, from tools to his hobby of longbow shooting.  And he was generous with his time and his knowledge.  And he had a disarming sense of humor that kept us knowing that we should be serious… but not deadly.

Probably his singular achievements, from our point of view: the 1995 award-winning exhibition Tools:  Working Wood in the Eighteenth Century with its accompanying book he co-authored with Nancy Hagedorn, all this done while he worked as Curator of Mechanical Arts for CW.

And of course, his major brainchild:  the Woodworking Symposium, held every January for the last 16 years, bringing so many of us, professionals, history buffs, and hobbyists together.

Most importantly, he expected and trusted all of us here to be professional and thorough, as employees, as artisans, as historians, as people.  That was how you earned his respect and his gratitude.

Jay was initially reluctant to take the reins of Director.  He enjoyed his work as a curator tremendously.  But as he subsequently proved, he was uniquely qualified for his position skippering this huge ship of Historic Trades, by his knowledge, his generosity and professional demeanor.  All with a light, but firm touch.

And who can forget his awful woodworker jokes sprinkled throughout each symposium session! And the requisite ceremonial removal of the necktie that signaled, “We’re on!” at the start of each one (applause every time) for the attendees.  And for us presenters, it signaled, “Here we go, oh gosh, we’re in trouble now!”

Ladies and Gentlemen, would you please rise up, drink a parting glass, and honor the man.

Thoughts and prayers for his friends and family.

Your comments and remembrances are welcome below.

The Hay Shop.


Posted in Shop Happenings | 19 Comments

A Simple Looking Glass Molding

The following write-up describes the making of a conventional looking glass molding that can be scaled up or down to suit the size of the frame. For better examination click on any of the images for an enlarged view.

IMG_3088

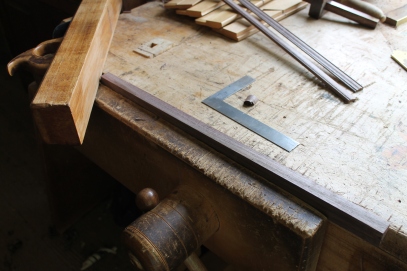
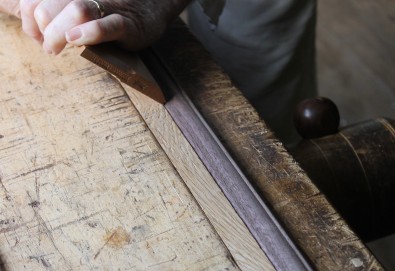
Generally I find it easier to work a molding on the edge or face of a larger piece of stock, and saw it off when done. It’s more convenient to hold in the vice or down on the bench. It always saves a lot of aggravation to make sure you have a straight reference face and square edge.

Straight stock with square edge
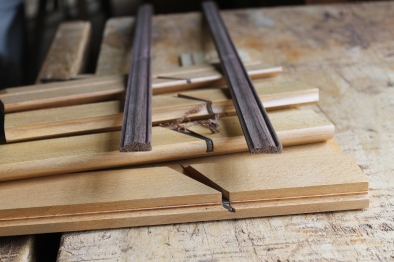
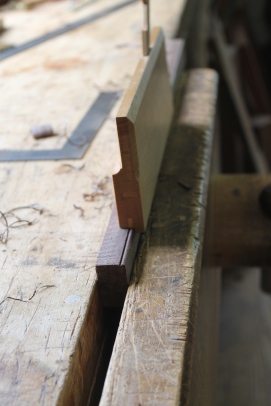
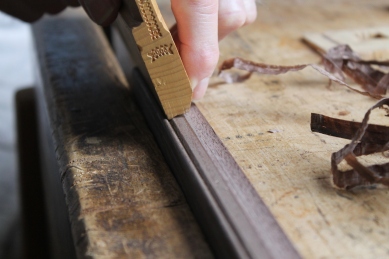
A beading plane (side bead) runs in the first element of this molding. It automatically registers on the edge of the stock.

Running in the side bead

Running in the side bead

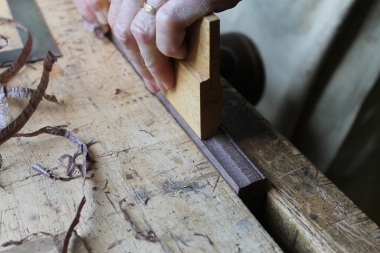
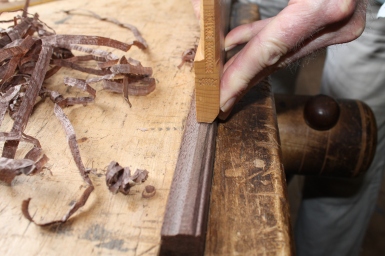
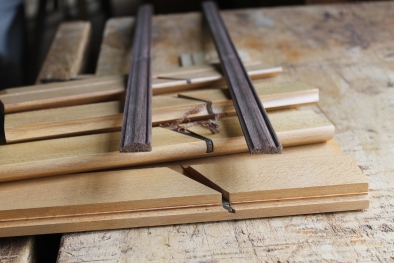
The next element is the concavity of the ogee profile cut in with the appropriate round plane. ( Molding planes take the name of the molding they cut, with the exception of hollows and rounds. They take the name of the profile of the plane.) Position the plane flush with the edge of the stock. Take a light first pass using your fingers as a fence to hold the plane in position. The plane will track in that first cut. Take the necessary passes to bring the profile down to the silhouette drawn on the ends of the stock.

IMG_3095
Before describing the use of the hollow plane it’s important to consider the orientation of the blade to the stock of the plane. Generally the blade of the hollow cuts very little if at all at the inside edge. On the outside and open face of the plane the blade will cut.3124a
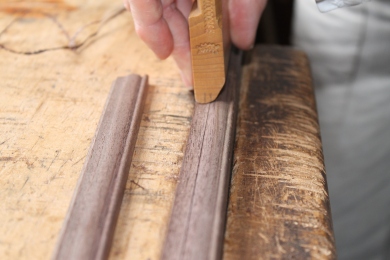
Use the outside cutting edge of the plane to lay over the round profile just inside the bead. (Notice that I’m planning in the opposite direction. This works only if the grain allows you to do so.)IMG_3096

At this point the hollow is used to bring the convex portion of the molding down till the flat just disappears.IMG_3105

Any score marks left from using the hollow can be cleaned up with a few light passes of the round. Note that I continue to use my fingers as a fence to ensure that the plane tracks flush with the edge of the stock

IMG_3109
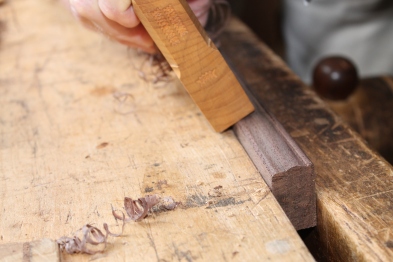
The final element of this profile is a small cove along the inside of the molding. Create an angled chamfer (for the small round plane to ride on) using a rabbet plane. IMG_3116
Plane in the cove with a small round plane using a board to register the plane against.IMG_3122
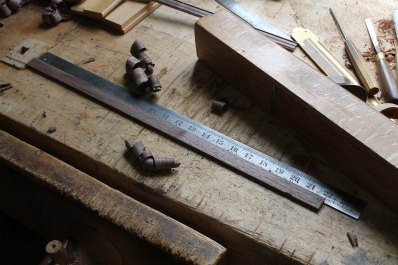
The profile now complete, the molding can be sawn off the stock and the back side planed clean to the scribed thickness. I used the straight edge just under the low side of the molding so that it’s supported and level with the bench.IMG_3090
Important points to consider: When using hand planes, working with the grain is much more convenient. Sharp and properly adjusted planes are a must. Finally there is no substitute for practice. Enjoy the process!

IMG_3088

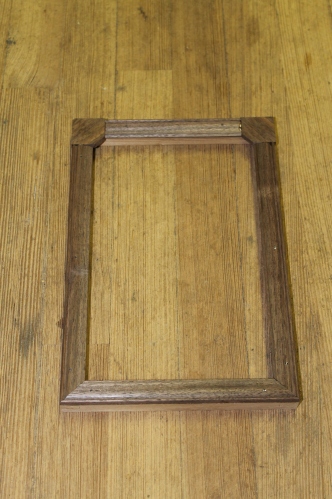
Here’s the finished molding applied to the frame. Carving the indented corners, and applying the fret-sawn decoration is still to come.

IMG_3127

Kaare

Posted in Miscellaneous Forms, Tools | 3 Comments

CONGRATULATIONS TO KAARE AND BILL

On July 8th at our Annual Trade Luncheon, Bill Pavlak and Kaare Loftheim received recognition for reaching individual milestones with Colonial Williamsburg.

Bill Pavlak achieved Journeyman status.

BILLJOURNEYMANKaare, the Anthony Hay Shop supervisor, congratulates Bill while Jay Gaynor looks on.  Bill’s “Initiation Hazing” will come later.

 Kaare Loftheim received recognition for 35 years of service.

KAARES]Which means Kaare has worked at the shop 10 years longer than the 18th century shop existed.

Anyone who has stopped by the shop will agree Kaare and Bill are tremendous assets. On a personal note, they make coming to work a pleasure.

All their bad jokes aside.

bill1_n 1986-WW-5775-21s


Thanks again guys and here’s to many years to come.

Brian


Posted in Shop Happenings | 5 Comments

My, what big feet you have…

Foot of the 1707 Philadelphia Escritoire.

Foot of the 1707 Philadelphia Escritoire.

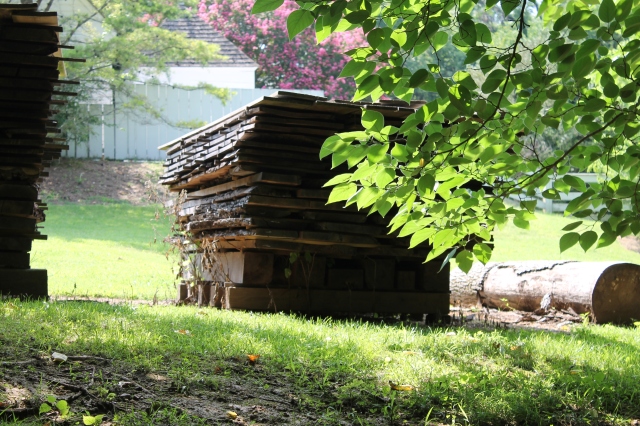
As I begin working on the 1707 Philadelphia Escritoire (the English also call this a scriptor, if you lack confidence in your French pronunciation), I am scrambling to find material of sufficient thickness.  The case parts on this are really heavy as are the bun feet.  At 4 1/2 inches in diameter, these feet have to come out of a substantial block of walnut.  Unfortunately, our inventory of seasoned walnut only goes up to 4 inch thick stock – we are not timber framers after all.  When Hurricane Irene shoved through Williamsburg three years ago we ended up with quite a bit of walnut to be sawn and seasoned.  At the time, Mack Headley decided that we ought to have a few heavy timbers  cut and set aside for those unusual projects that come along now and then.  So out there in the stacks are some really heavy boards (8 inches square) and some less heavy, heavy boards (5 inches square).  That is good news for my feet, but you know the rule for air drying lumber: one year for every inch of thickness.  Hurricane Irene was in 2011, it is now 2014, this board is 5 inches thick, and it has been at the bottom of the stack – raised off the ground, but next to the soggy Williamsburg earth nonetheless – sucking in moisture while it is losing moisture.

Well I think we’ll be able to use one of these five inch boards, but I need to treat things a little differently than usual.  Because the feet are independent of the case itself, it should be reasonable to work them somewhat green and have them get along with the more seasoned wood in the case.  I wanted to get this stuff inside and cut up as soon as possible then do something to retard the drying somewhat.  Here are some shots of how I am handling this.

The 5" square blank was lurking in the shadows at the bottom of this stack.

The 5″ square blank was lurking in the shadows at the bottom of this stack.

Just under 5" square this board was ready for rough planing and then cutting into three lengths.

Just under 5″ square this board was ready for rough planing and then sawing to length.  I cut enough for the four feet plus one extra, just in case.  I cut this up in three lengths: two which contain enough wood for two feet and one for the extra.

I think this is nicely quartered stuff, Brian says it looks really flat sawn.  Tilt your head Brian.

I think this is nicely quartered stuff, Brian says it looks really flat sawn. Tilt your head Brian.

Blanks with two faces squared and then corners knocked off.

Blanks with two faces squared and then their corners knocked off.

I sealed the end grain with leftover seed lac varnish (the nasty stuff at the bottom of the jar with all the dregs and dross.

I sealed the end grain with leftover seed lac varnish (the nasty stuff at the bottom of the jar with all the dregs and dross).

I packed the blanks in a box with shavings.  Hopefully this will allow them to dry, but slow things down enough to reduce the risk of checking, splitting, cracking...   We'll see how they look  in a few weeks.

I packed the blanks in a box with shavings (I was lacking a period appropriate container). Hopefully this will allow them to dry, but slow things down enough to reduce the risk of checking, splitting, cracking…
We’ll see how they look in a couple of months.

In other words, I got some material that looks sound and inherently stable.  I have roughed it out and will now leave it in the shop environment to adjust.  Because there is such a big risk of checking, I took steps to reduce it (sealing the end grain and packing them in shavings). If this doesn’t work, the odds are that I will find out when I take them out of the box and not after I have turned them…I hope.

Bill Pavlak.

Posted in Casework, Turning, Wood | Tagged , , , , , | 8 Comments